Showing posts with label spray paint. Show all posts
8.06.2013
Party DIY {Birthday Candle Holders}
I feel like I say this with every DIY, but this one has to be one of my favorites. And, this time I really mean it. If you are anything like me (a cake aficionado), then the thought of ever having wax from the candle touch your cake is just terrible. Every year, I rush along the lighting, singing, and wish making process just trying to make sure not a drop ruins the pure amazingness of my Italian Cream Cake with Coconut filling. It's a tradition that comes along once a year and should really be treasured, not rushed. But fear no more, these handy little devises prevent the wax cake dilemma.
Sometimes, a DIY is not about creating something new, but finding a new use for something already in existence. This past weekend we were roaming Lowe's looking for supplies for another project when a mixture of boredom and hunger took over. While Rob was searching for the perfect size nuts and washers, I began opening the drawers labeled "Hobbies" on the hardware aisle. In these drawers I found the best miniature wood pieces with a thousand uses. They had everything from wood cubes to spheres to mini wood flower pots. Also floating in the drawers were these. I looked at them for a brief second wondering what in the world you would do with it. All of a sudden it dawned on me. The pre-drilled hole is the perfect size for a birthday candle! Obviously not it's intended purpose but perfect to solve the wax cake dilemma. I picked up a pack of 4 for a mere $1.78, and with a can of spray paint I already had a home, I created a super cute candle holder that will get more uses than I can ever count. Here's the easy how-to...
:: Supplies ::
Wooden Tires (Hobby Drawer on Hardware Aisle)
Spray Paint
Birthday Candles
:: Directions ::
Spray tires in desired color. Let dry and stick in candle. Adorn cake.
Labels:
birthday candle,
birthday candle holder,
candle holder,
easy diy,
lowes diy,
no wax on the cake,
party diy,
spray paint,
wax cake,
wood tire
7.24.2013
Guess What....
I'm leaving this one up to you guys. I am so excited about the next issue of LPF Mag that I can barely stand it. The thing is, I want so bad to share what I'm doing, but I want the shock and awe factor when the issue comes out. So, to tempt you and indulge me, I'm sharing this one image from the behind the scenes. I would love to hear your guesses about what I'm doing with a drop cloth, paint cans, air duct cap, spray paint and wine glasses. Hint...it's not home repairs!
Have a happy Wednesday!
Labels:
air duct cap,
drop cloth,
guess what,
lpf mag,
lpf mag issue 5,
paint cans,
spray paint,
wine glasses
2.27.2013
Party DIY {Modern Stripped Votives}
I shared with you yesterday the new party trend for 2013, elegant and modern with a vintage touch. But, elegant and modern doesn't mean you can't create your own party details. Always a fan of the DIY, I wanted to show you a way to create a centerpiece representing the new trend with a handmade touch. These stripped votives were easy enough to make and would fit any event perfectly. The stripes are a bit quirky with the gray adding a modern touch. The modern shape of the votives completes the whole look. Here's how to make your own!
:: Supplies ::
3 Glass Cylinder Vases of Varying Sizes
Painter's Tape
Gray Spray Paint
:: Directions ::
1. Tape each vase with painters tape, leaving 1" of space between each piece of tape.
2. Spray with gray paint. Let dry and spray a second coat.
3. Once paint is dry, remove painter's tape.
4. Fill votives and decorate!
Labels:
2013 parties,
center of attention,
modern centerpiece,
modern stripped votives,
painters tape,
party diy,
party trends,
spray paint,
votives
1.29.2013
Party DIY {Mustache Coasters}
I spent most of last Friday getting ready for some photo shoots coming up for LPF Magazine. It's going to be a series of beach parties each with a different theme. I already revealed that one of the themes will be a beach fiesta and I couldn't be more excited for it. I decided to incorporate a little whimsy into this bash by using some classic mustache touches which left me feeling a bit inspired. While these coasters won't be part of the shoot, they are a fun touch to add to your next gathering. While I used mustaches, you can really make these custom coasters fit any theme. All you need is a pack of cork coasters from your local craft store (I got mine at Hobby Lobby.), spray paint, stickers or painter's tape. I can imagine making them with the first letter of each guest's name, stripes, polka dots, and more. Here's the DIY.
:: Supplies ::
Cork Coasters
Spray Paint
Stickers or Painter's Tape
:: Directions ::
1. Apply sticker in desired area or painter's tape in desired pattern.
2. On a flat surface outdoors, spray with one coat of spray paint. Let dry.
3. Once first coat of spray paint is dry, spray again. Continue until you reach the desired color.
4. Once all coats of spray paint are dry, remove sticker or paint.
What design would you put on your custom coaster?
Labels:
coasters,
color me,
cork coaster,
custom coasters,
mustache,
mustache coasters,
painters tape,
party diy,
spray paint
1.23.2013
Party DIY {Wood Card Box}
I told you yesterday all about part of my issue with clementines, how there are always so many and how I have to find new ways to use them up. But, what I didn't tell you about was the awesome box they come in. That may seem a bit silly but for the price of the clementines, you get this incredibly sturdy wood box that once decorated can be used for any number of things. With a can of spray paint, you can easily redo this box making it fit to your specific esthetic. For showman's sake I went with a simply navy blue and adorned it with a chalk board card sign. However, the possibilities are endless. You can go so far as to glue rhinestones around the edge, create miniature bunting, or even tie ribbon and bows at the corners. The (short!) supply list is below and a super easy DIY follows. How would you use your clementine box?
:: Supplies ::
Clementine Box
Choice Color Spray Paint (I suggest 2 cans)
Decorations as you please
:: Directions ::
1. Begin by removing the netting from the box and wiping free of all debris.
2. Start spray painting the box in your choice color in layers. The wood is very porous so it is suggested to let each layer of spray paint dry before spraying again.
3. Once all sides are completely covered and paint is dry, adorn with your desired decorations and enjoy!
Labels:
card box,
clementine box,
clementines,
color me,
decor,
party diy,
spray paint,
wood card box
9.27.2011
Fun and Games {Ring Toss}
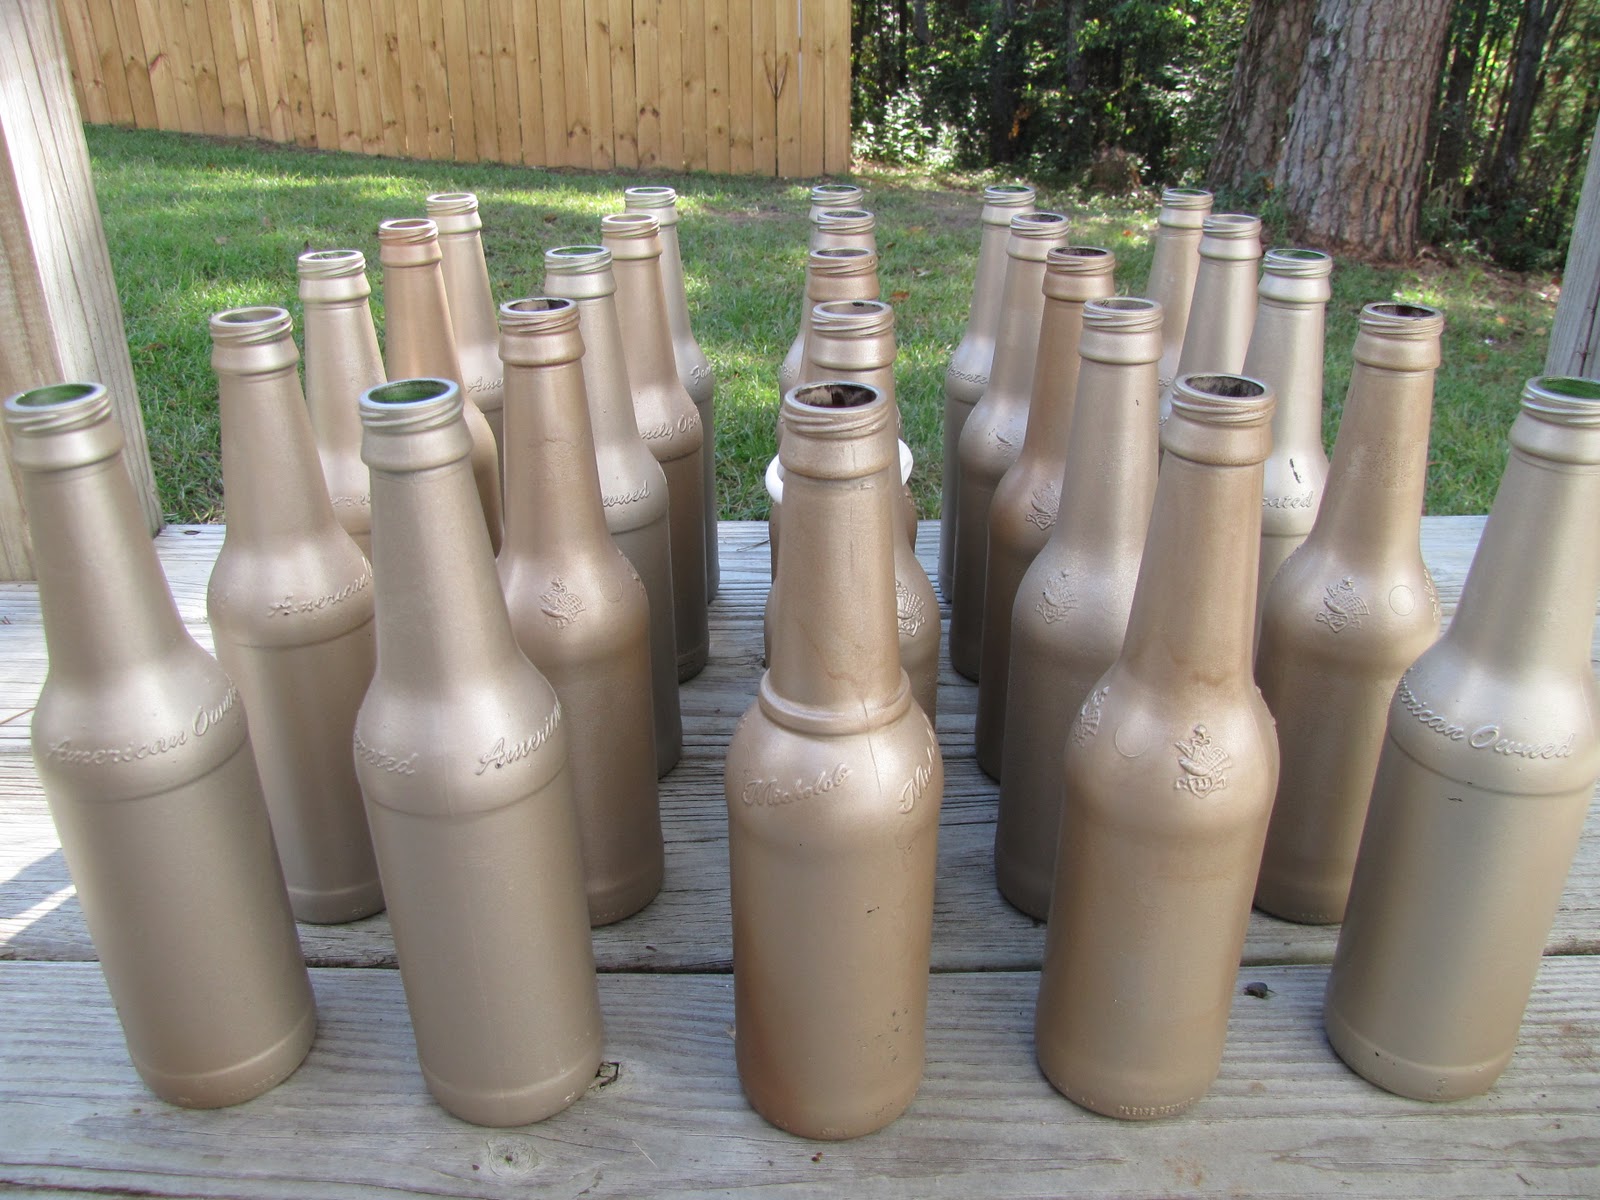
What's a carnival without ring toss? It's one of my favorite carnival games from when I was little. And, by the way, there is a huge gap in the market for purchasing/renting ring toss games. Hence why I decided to make my own! After many, many beers (over the course of a couple months...), 4 cans of spray paint, and countless hours of label peeling later, it is finished. I made two sets of this game so that more than one person could play at a time. So here's what you need to make it....
{50} label-less beer bottles -> note. It's better to use bottles with paper labels rather than ones that have sticker labels. The sticker labels leave a residue that DOES NOT come off. Trust me...
{4} cans of spray paint -> I used "Caramel Latte" to add a splash of something different. I was starting to get a little over the top on all of the navy, red, and yellow details. However, feel free to use whatever color you like.
{1} pack of shower rings.
So the best method for getting the labels off the bottles I discovered, is to fill a bucket with hot water and submerge the bottles in the water. The longer it can soak the easier it is to peel off the label. Once it's peeled off, you will still need to scrub it with a wash cloth to get the remaining residue off. Once the bottles are clean, dry them off and begin to spray paint. Once all the bottles are spray painted, let them dry. I left mine outside for a couple of hours. Maybe 3 or 4. After they are dry, you are good to go!
Have fun!
Labels:
bottles,
carnival,
carnival games,
crafty,
fun and games,
get crafty,
ring toss,
spray paint
Subscribe to:
Posts (Atom)