1.20.2014

Color Me {New Beginnings}


Well friends, it's Monday, meaning it's time for my big announcement. Events Uncorked is getting a makeover! I'm so excited for this next step in growing this little blog. Like anything, the only way to improve and do better is to constantly reach beyond your comfort zone. That's what I'm doing here. Over the next couple of months, I'm going to step back from blogging to concentrate on building the new site, creating exciting fun content, and overall taking Events Uncorked in the direction it needs to be going.

Over the past couple of years, I've throughly enjoyed sharing ideas and inspiration with you all everyday. But, I've struggled to really find my niche and produce quality posts continuously. The good news is, I've finally found the true direction I want to take this blog in. The bad news is, that means taking a few months away to focus in on the ideas and really develop this into something I'm proud of.

I shared with you on Friday five of my favorite blogs. These are the ones I check almost daily for that source of creative inspiration. I want this site to be just that for you. The new Events Uncorked will focus on home entertaining, creating realistic events that you don't have to have a big budget and a lot of time to execute. It will show you that throwing a fabulous party at home doesn't have to be stressful and overwhelming. While I do plan events for a living, my favorite parties to throw are those hosted in the comfort of my own home.

I'll be sure to share sneak peeks of my progress throughout the process, and if you have any thoughts on what you would love to see on the new site, let me know right here! Also, be sure to follow me on Pinterest and Twitter for all the latest updates.

Caio for now and I'll see you all on the new site June 2nd!

1.17.2014

Weekend Reads {1.17.14}


Happy Friday y'all! It's been a long week around here between work and Rob being sick. But it's the weekend and things are looking up! Rob is feeling better and I've got a big announcement coming your way on Monday that I'm very anxious to share. Frankly, my mind is a little distracted with that right now making it hard to concentrate on anything else. The theme for today's weekly reads does have a theme but I'm not quite sure it will be clear until Monday. So, to take us into the weekend, I'm sharing my five favorite blogs. These are the ones that I check day in and day out. They have inspiration lurking around every corner and make me what to push myself to the next level. Hope you enjoy them as much as I do!

Have a good weekend!

1. Camille Styles

2. House of Earnest

3. La Petite Fashionista 

4. Fabric Paper Glue

5. Hank and Hunt

1.16.2014

Indulge In {Caprese Grilled Cheese}


Thursday means two things to me, one more day till Friday and another mouth watering recipe. With the sharing of yesterday's build your own grilled cheese bar, I figured I'd share one of my favorite grilled cheese recipes of all time. There is nothing that speaks of comfort quite like a golden brown, buttery grilled cheese. This is stuffed with your average American cheese though. Filled with fresh mozzarella, chopped basil, and ripe tomatoes, this is the ultimate grown up grilled cheese. Here's the recipe…

:: Ingredients ::
2 Tablespoon Butter, divided
2 Slices Thick Bakery Bread
4 oz Fresh Mozzarella
2 Slices Vine Ripe Tomato
4 Basil Leaves, sliced

:: Directions ::
1. Heat 1 tablespoon butter in a pan over medium high heat. Spread 1/2 tablespoon of butter on each slice of bread.
2. Layer mozzarella, tomato and basil between the two slices of bread. Cook on each side until golden brown.

1.15.2014

Baby It's Cold Outside


With the big winter storms behind us, it seems that temperatures are warming up across the country. For now at least. However, a cold front is sure to pop back up at any moment and I've got just the ticket for entertaining on those brutally cold evenings.


If you have friends who don't enjoy a "create your own" bar, then they probably shouldn't be your friends. We all have different tastes and the ability to create your ultimate grilled cheese is one of my favorite concepts. Build your grilled cheese bar with a variety of mild and pungent cheese, fresh basil, prosciutto, and any of your other favorite toppings. Pair it with the homemade tomato soup I shared with you last week and you quite possibly have the most unique cold weather entertaining set-up.


What's your favorite way to entertain when it's cold out? How do you make your guests feel warm and welcome?

1.14.2014

Party DIY {Mason Jar Coasters}


Do you ever have one of those moments where a great idea hits you. It comes out of no where and you wonder why you hadn't thought of it sooner. This is one of those projects. I accidentally bought the wrong size mason jar lids a few months back and never returned them. I've been trying to think of something to do with them ever since.


We are big fans of coasters around here trying to preserve the furniture from unwanted drink rings. The problem is a cold beverage sweats, and that cold beverage then sticks to the coaster and gets excess water everywhere. Well, problem solved. By turning these mason jar lids into coasters, they can now catch the excess liquid and continue to preserve our furniture. Frankly, it's quite perfect! Here's the easy step by step…

:: Supplies ::
Wide Mouth Mason Jar Lids
Hot Glue
Spray Paint
Letter Stickers

:: Directions ::
1. Place a bead of hot glue on the inside lip of band. Attach flat lid. 
2. Spray paint in your favorite color. Let dry completely.
3. Center letter sticker and use!

1.13.2014

Color Me {Confetti}


Hello Monday! Usually I'm not a fan of the day, but today is my birthday making it a completely different story. And what screams birthday more than a room full of confetti. I'm talking confetti in envelopes, confetti covered tables, confetti balloons, the whole nine yards. While you can have a party without confetti, it really just makes it better. I'm off now to spend the day celebrating but I will catch you back here tomorrow morning for an ingenious use of mason jar lids.

Have a celebratory Monday!

1.10.2014

Weekend Reads {1.10.14}


Oh goodness, there is so much to talk about today and so many amazing links to share! Not only is it Friday, I've got fabulous dinner plans with a fabulous friend tonight, a fun bridal show this weekend, and most excitingly my birthday is Monday. To put it simply, next to just about every other holiday, my birthday is my most favorite! I mean what's not to love, there is always cake, cocktails, and confetti; my three favorite "C"s. So in honor of my birthday and the rest of you celebrating birthdays soon, I'm sharing my links from the week full of my must have birthday items. Hope you enjoy!

1. The Grand Margarita from Apartment 34

2. Italian Cream Cake from Boulder Locavore

3. Confetti Dipped Balloons from Studio DIY

4. Balloon Cake Topper from The Martha Stewart Crafts Department

5. Geometric Piñata DIY from Reveiller

1.09.2014

Indulge In {Light & Creamy Spicy Tomato Soup}


Well, I was hoping for a much warmer day by today or at least a sign of warmth. Sadly, it's still cold. The good news is that means soup! I am a sucker for a hot bowl of soup on a cold night sitting by the fire. What I really can't say no to though is the classic combination of homemade tomato soup and cheesy grilled cheese. It was a childhood favorite of mine, but now a days I like to kick it up just a bit. This soup is a bit spicy which adds an extra level of warmth perfect for chilly night gatherings. One of my favorite ways to serve it up is actually with a build your own grilled cheese bar that I will show you next week. In the mean time, here's the recipe….

:: Ingredients ::
2 Large Leeks, diced
2 Tablespoons Olive Oil
1/2 Teaspoon Ground Cumin
3/8 Teaspoon Kosher Salt
1/4 Teaspoon Paprika
1/2 Tablespoon Red Pepper Flakes
4 Garlic Cloves, minced
1 (14 oz) Can San Marzano Whole Peeled Tomatoes
2 Cups Unsalted Chicken Stock
1/4 Cup Half & Half
1/4 Cup Chopped Fresh Basil


:: Directions ::
1. Heat olive oil in large stock pot over medium heat. Saute leeks with cumin, paprika, red pepper, and salt about 5 minutes or until leeks have cooked down.  
2. Increase heat to medium high and add garlic. Cook, stirring constantly, for 1 minute.
3. Stir in tomatoes, chicken stock, and basil. Bring to a boil. Reduce heat and simmer for 15 minutes.
4. Place half of the tomato mixture to a blender and puree until smooth. Transfer to a bowl. Add the remaining tomato mixture to the blender pureeing until smooth. Return all the soup to the pot and serve immediately.

*Recipe adapted from Cooking Light. Image courtesy of Cooking Light.

1.08.2014

The Happiest Hour {Citrus Champagne Punch}


I wish I could fill your head with warm thoughts today about how Florida is gorgeous and warm and delightful, but I can't. It's seriously just as cold here as any where else. While I can't to stop thinking about how cold my toes are, I am trying to fill my head with happy thoughts. Thoughts of sunshine filled spring days while sipping this beauty are the only hope I have of warmth right now. While I love a good champagne punch for celebratory occasions, it's also just as appropriate for warm afternoons, brunches, Saturday mornings, and everything in between. The combination of lights and refreshing citrus with ginger ale, peach nectar and a splash of champagne is just what the doctor ordered for any day with celebrating! Here's the recipe…


:: Ingredients ::
1 Bottle Champagne or Prosecco
1 Grapefruit, sliced thin
1 Lemon, sliced thin
2 Clementine, sliced thin
1 Quart Strawberries, sliced
2 Cans Ginger Ale
2 Cans Peach Nectar

:: Directions ::
1. Mix all ingredients except the champagne in a large pitcher. Let sit overnight for all flavors to combine.
2. Fill a glass with ice half full with Ginger Ale mixture. Top with champagne and serve.


1.07.2014

Party DIY {Bow Tie Notecards}


Every once and awhile I like to go browsing my favorite sites to see what goodies they have and if I can recreate them. Today's Party DIY was inspired by the adorable bow tie name cards from Anthropologie. Since I didn't feel the urge to spend money at the time, I decided to try and make my own version. They were surprisingly easy and now that I know how to make the bow just right, I can adorn all sorts of paper goods with them. I'm imagining not only note cards and name cards but menus, gift tags, cards, notebooks, and more! Let's face it, everything is better with a bow on it! Here's the step by step on this fun little DIY I will be using for months to come…

:: Supplies ::
2" Wide Grosgrain Ribbon, cut into 10" pieces
Twine
Scissors
Hot Glue
Note Cards


:: Directions ::
1. Start by folding your 10" piece of grosgrain ribbon into thirds.
2. On the horizontal, pinch the middle of the ribbon. From there grab the excess ribbon on each side of the pinch to form a bustle in the center.
3. Wrap your twine around the center bustle six times tying it off with a double knot to secure. Trim ends of twine.
4. Place a dab of hot glue on the back of the twine and secure to note card.

1.06.2014

Color Me {Garnet}


Today is all about superstition. My dear Seminoles are playing for the National Championship tonight and I'm such a nervous wreck that I'm doing everything I can in hopes to not "mess it up" per se. It seems a little silly I know, but I can't help it.  Not only is garnet the color of my beloved Noles, but it's a beautiful rich shade for winter affairs. It pairs nicely with soft neutrals and bold metallics allowing it to be easily incorporated into the color scheme for any type of get together. Plus it really warms up a space on a cold winter's night!

1.03.2014

Weekend Reads {1.3.14}


Well, we are finally back from our tour of Florida. We had a great trip spending time with family and friends, but it's nice to be home for a few days before heading back to work. I'm unpacking all my Christmas goodies today and finding a place for everything can be hard. So, to start the new year out fresh, I'm going to be taking the time today to clean out closets and cabinets and try to get organized. It's something I've been meaning to do for a while now and there's nothing like a new year for de-cluttering and a fresh start! Here are some tips from the pros on organizing and doing it in style…

1. DIY Gift Wrap Station from I Heart Organizing 

2. 15 Organizing Ideas from A Pumpkin & A Princess


4. Stenciled Burlap Jewelry Organizer from DIY Design Fanatic

5. Pretty Organized from Handmade Charlotte

1.02.2014

Indulge In {Tomato Basil Quinoa Stuffed Zucchini}


Like many of you, I try to eat healthy all the time. Most of the time I fail. What can I say, nothing beats hot pizza with cold beer and baking is my favorite! Again this year, I am making an effort to eliminate the bad foods from my life and replace them with healthy ones. In an attempt to do so, I'm sharing a recipe with you today that is as equally healthy as it is delicious. Plus with every bite, I miss that pizza less and less….kinda. The beauty of this dish is that you can customize it to your own taste.  Here's the recipe. Hope we all have a healthy 2014!

:: Ingredients ::
3 Large Zucchini, quartered with centers scooped out
2 Cups Cooked Quinoa
1 Pint Grape Tomatoes, quartered
2 Cloves Garlic, minced
1/2 Cup Basil, cut into ribbons
1 Cup Parmesan Cheese, shredded
Olive Oil
Salt & Pepper

:: Directions ::
1. Preheat oven to 350 degrees. Drizzle zucchini with olive oil, season with salt and pepper, and roast for 10-15 minutes until just cooked.
2. While zucchini is cooking, Sauté garlic, tomatoes and basil in olive oil over medium heat. Once tomatoes have broken down, mix with quinoa and season with salt and pepper to taste.
3. Spoon approximately 1/2 cup of the quinoa mixture into each zucchini, sprinkle with parmesan cheese and return to oven until parmesan has slightly melted, approximately 10 minutes. Serve immediately.


1.01.2014

Happy New Year!


Well 2013, it was fun. But, I have a feeling 2014 is going to be even better! As the new year begins, I want to take a brief moment today to look back on all the good times of 2013. I have put together a collage of my favorite memories, posts, and celebrations from the year to remember to be grateful for all the good times and realize that every bad is always followed by two great ones!

What are some of your favorite memories from 2013?

12.31.2013

Party DIY {New Year's Party Hats}


Happy New Year's Eve! Much like I did on Christmas Eve, I wanted to share a fun DIY with you to celebrate the day. I created these New Year's party hats for a guest post on La Petite Fashionista last year and they are just too cute to not share again this year. New Year's is the one holiday you can get away with being dressed up and sporting a glittery party hat so why not do it. Instead of buying your head decor at the store this year, follow this easy step by step and make your own that will have all your friends "ohh" and "awing"! Have a safe and happy New Year!


 :: Supplies ::
Glittered Scrapbook Paper
Silver Tinsel
Plastic Headbands
Hot Glue
Ruler
Scissors
Pen

:: Directions ::
1. Begin by finding the center point on the bottom back side of the scrapbook paper. Draw an 8" line from the center mark to the edge. Repeat from the center line to the other edge. Draw and rounded edge connecting the two lines.
2. Cut out stencil and trace on remaining sheets of scrapbook paper. Cut the tip off.
3. Place a dab of hot glue in the top corner and connect to the other side. Run a line of hot glue down the inside of the top piece and fold over to connect.
4. Run hot glue along the bottom edge of the hat and attach tinsel. Cut a 2" piece of tinsel and roll into a ball, attaching the end with hot glue. Glue to the top of the hat.
5. Place two dabs of hot glue on opposite sides of the inside of the hat and attach to headband. Let dry and wear!

12.30.2013

Color Me {Pop Fizz Clink}


Happy almost New Year. With Christmas behind us, it's time to get those New Year's plans in order. Start writing down your resolutions and gathering up the bottles of champagne. It's time to remember the great memories of 2013 but starting looking towards all the fun of 2014. Whether 2013 was a good year for you (hopefully it was!) or not, it must come to an end. And what better way to end one chapter and begin another than with an over the top soiree. Bring out the glitz and glam with a classic color scheme of black, silver and gold. Add glitter to whatever you can and most importantly remember to pop open a bottle of bubbly in celebration!

What are your plans for the New Year?

12.27.2013

Weekend Reads {12.27.13}


Well my friends, before we know it, 2013 will have come and gone. I don't know if you feel the same, but it seems this year has gone by incredibly fast. Maybe it's because work really picked up this year or maybe it's because we were just having so much fun, either way, it's hard to believe we will be ringing in 2014 in a few short days. I'll share a look back at some of my favorite memories from 2013 next week, but for now, it's time to start planning those New Year's celebrations. Whether you plan on ringing in the New Year out on the town or cuddled up at home with a glass of champagne, it's always best you do it in style. I've gathered up my five favorite New Year's themed posts for you today that are sure to make any gathering the talk of the town. Have a great weekend! 

1. A Kate Spade New York NYE Party from The Glitter Guide

2. DIY Confetti Poppers from Wedding Bells

3. Favorite Drink Stations from Wedding Chicks

4. Clever NYE Favors from Fabric Paper Glue for Oh So Beautiful Paper

5. Ring in the New Year Right with She Knows

12.26.2013

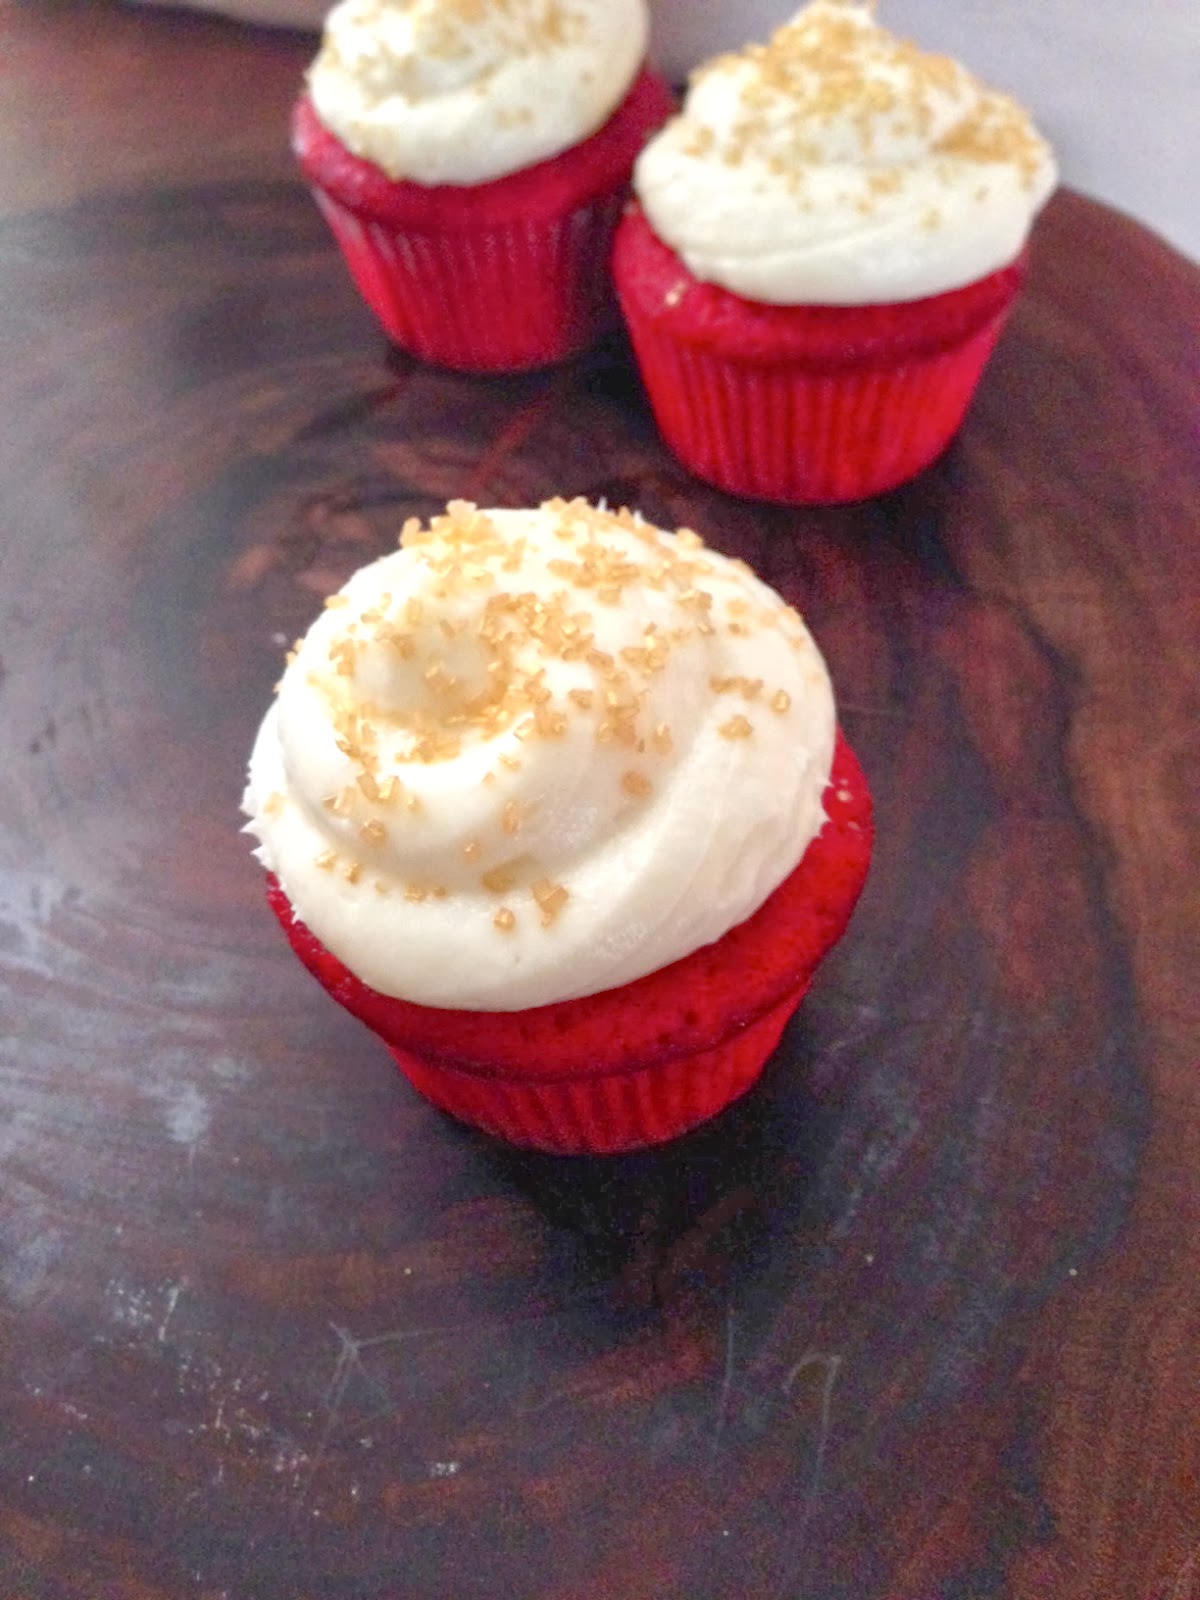
Indulge In {Red Velvet Cupcakes}


I don't even know where to start with this recipe. If I could truly put into words how amazing these red velvet cupcakes are, I would probably have a starting point. Unfortunately I don't, but I will try to do my best. First let me start by saying this is a recipe I got from my aunt and it is hands down my favorite dessert ever. To this day, I have not found another red velvet cake that has even come close to this.

There is very little I know about food in comparison to others, but if there is one thing I know about, it's red velvet cake. Others may try and tell you that all you need to do is add red food coloring to chocolate cake or that using vinegar and buttermilk will mess it up, but they are wrong. And, if someone ttys to put something besides cream cheese frosting on top, run the other way….fast! I'm going to stop rambling now, share the recipe with you, and let you judge for yourself. Hope everyone had a Merry Christmas and I can't wait to hear what you think!


:: Red Velvet Ingredients ::
*Makes 24 Cupcakes
2 1/2 Cups All Purpose Flour
2 Cups Sugar
2 Cups Wesson Oil
1 Cup Buttermilk (If you don't have buttermilk, mix 1 Tablespoon Vinegar with 1 Cup Milk)
2 Eggs
1 Teaspoon Cocoa
1 Teaspoon Vinegar
1 Bottle Red Food Coloring
1 Teaspoon Salt
1 Teaspoon Baking Soda
1 Teaspoon Vanilla

:: Red Velvet Directions ::
1. Cream sugar and oil in large bowl. Add eggs and mix till just combined.
2. In a separate bowl, combine vinegar, food coloring, and cocoa. Pour into sugar, oil and egg mixture and blend.
3. With your mixer on, alternate adding flour and buttermilk to the mixture.
4. Add baking soda, vanilla, and salt. Mix till combined. 
5. In a cupcake tin with liners, fill each with 1/4 cup of the batter. Bake at 350 degrees for 25 minutes. 
6. Let cool completely before icing.

:: Whipped Cream Cheese Frosting Ingredients ::
2 Blocks Cream Cheese, softened
1 Pint Heavy Whipping Cream
2 Cups Powdered Sugar
1 Teaspoon Vanilla Extract

:: Frosting Directions ::
*Tip: Place metal bowl and beaters into freezer for approximately 10-15 minutes before you make your frosting. This helps when whipping the cream. 
1. With your mixer on high, beat whipping cream until stiff peaks form. 
2. Add cream cheese and mix until combined. 
3. Beat in powdered sugar and vanilla extract. 
4. Pipe onto cooled cupcakes. 

12.25.2013

Merry Christmas!


Merry Christmas. Feliz Navidad. Joyeux Noel. Mele Kalikimaka. Buone Feste Natalizie. 

No matter how you say it, here's wish you and yours a very Merry Christmas! 

12.24.2013

Party DIY {Colorful Christmas Ornaments}


Merry Christmas Eve everyone! It's so hard to believe that it's already here. But, before it's come and gone, I wanted to share one last holiday DIY with you. I've always been a big fan of handmade decorations, things that are different and have a story or meaning behind them. I like being able to say "Oh I made that!" when someone compliments the party or holiday decorations around my house. Christmas ornaments are no different. While I have my favorite ornaments that have been gifts from friends and family, the ones that really set my tree apart are the ones I made myself. This year's handmade ornaments are definitely the best so far. Who knew that a simple glass ball filled with colorful paint and decorated with a paint pen could make such a big impact? I definitely didn't! Trust me though, I will definitely be making more of these for next year's tree they turned out so good! Here's the step-by-step….


:: Supplies ::
Clear Glass Ornaments
Choice Color Acrylic Craft Paint (1 bottle coats approximately 4 ornaments)
Choice Color Fine Tip Paint Pen

:: Directions ::
1. Remove silver top from ornament and set aside.
2. Squirt approximately 1/4 bottle of craft paint into ornament. Turn ornament so that paint coats the inside. Return to ornament tray to let dry. Tip: Start by turning ornament upside down to drain any excess paint. Rotate every 15-20 minutes after that onto a different side so that paint does not drip and settle in one spot creating a spotty ornament. If the paint on the inside is not completely dry, over time all the paint will settle at the bottom leaving you with a half painted ornament if not rotated. I let mine dry approximately 2 hours. 
3. Place cap back on ornament. Using your paint pen, draw the design of your choice. 
    *To create the design I made use the following steps. 
         A. On the cap to your ornament, you will see slight indentations. Draw a line approximately half          way down the ornament from each of those indentations. 
         B. Connect each line at the top with a slightly curved line. When you look down on it, it should look like a flower. Repeat with a second slightly curved line approximately 1/4" down from the first. 
         C. Dot above each curved line with the tip of your paint pen. At the end of each straight line create an asterisk. 


I hope you have a crafty Christmas Eve!